Part One – Installing the Systems and Setting up Clustering
This article gives the basic steps in Server 2008 R2 to create a test lab with a 2-node, SQL Server failover cluster. To perform the steps in this article you will need a virtualization platform capable of running two instances of Windows Server 2008 R2 and an iSCSI target, such as iSCSI Cake or StarWind. Please note that many popular Open Source iSCSI systems, such as OpenFiler, do not support persistent reservations, which is a requirement of creating a failover cluster in Server 2008/Server 2008 R2. You should also have a working Active Directory infrastructure already installed.
Step One – The Setup
The graphic to the left shows the basic setup we are going to use. In the image the two VMs are clustered via Windows Server 2008 R2 failover clustering. They share a set of logical disks using the iSCSI protocol. As stated in the introductory paragraph I suggest using either iSCSI Cake or StarWind to set up your iSCSI targets and LUNs. If you do not know what iSCSI is or would like to brush up on the terminology I suggest the Wikipedia article. Once you have created the VMs and the iSCSI targets you should install the operating systems on the VMs. Ideally the VMs should have three network cards: one for the domain, one for the SAN, and the third for the cluster heartbeat. For the OS, I suggest simply downloading the Server 2008 R2 evaluation ISO from Microsoft. Once you have your servers installed you should run Windows update, rename them, and then join them to your domain.
After this is complete we can begin the process of adding the iSCSI disks and installing the clustering service. You will need at least two LUNs for clustering. The first will be for the cluster quorum, and the second will be for the database files.
Step two - Setting Up iSCSI
First you will need to activate the iSCSI service. To do this, click Start and then type iSCSI in the search field. The Microsoft iSCSI Initiator should appear in your search results. Open the iSCSI Initiator. You will be prompted that the service needs to be started and added to the firewall exclusion list. Click 'yes' to allow this. Once the Initiator opens, select the Discovery tab. Click 'Discover Portal'.
Step Three – Installing Failover Clustering
To install Failover Clustering open Server Manager and select Features. Click 'add a feature' and follow the wizard.
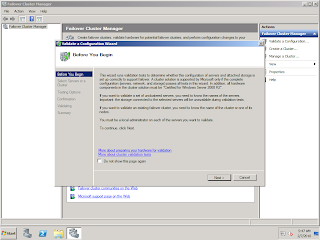
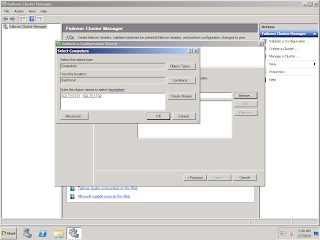
Once the installation wizard completes on both nodes you will need to run the Validate a Configuration Wizard to validate your cluster. Do not skip this step as it will help you to prevent creating problems when you install the Clustering Service. Run all of the tests.
Once your tests have been run successfully you can begin creating the cluster with the Create Cluster Wizard. This is a fairly simple wizard; the only important steps to pay attention to is that you have added both nodes to the cluster and that you have an unused IP address that can be used for the cluster service itself. Note that this IP address will not be the one used by the SQL Server instance we will be installing later.
You should also notice that the disks no longer appear in Computer on the second node as well as the disks being "reserved" in disk management.
Conclusion
As you can see Microsoft has made getting a basic cluster up and running very easy. But it should be noted that clustering is not a substitute for back up, nor is it a silver bullet for high-availability. Microsoft's cluster does its job very well, but in order for it to help you when the chips are down you need to understand not only how to install and implement it, but you also need to know what it can and cannot do. Just as an example, say our SAN goes down, then what? Having a cluster in no way protects our database in that way.
In the next part of this article we will discuss how to prepare the servers for the installation of SQL Server 2008 as well as how to slip stream SP1 into the 2008 installation. I will also outline some labs and tests that can be run.


0 comments:
Post a Comment